
Key Takeaways:
- Learn how to overlay videos in CapCut on PC
- Discover how to adjust the size of overlays
- Get tips for positioning your videos effectively
Adding overlays in CapCut on PC can enhance your video editing skills. This guide will walk you through the necessary steps to overlay videos easily, letting your creativity shine. Whether you’re adding a face cam or combining clips, we’ll ensure you know how to achieve the desired effect without hassle.
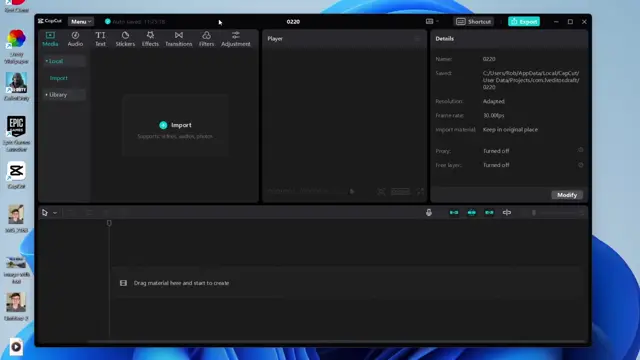
Step 1: Import Your Videos
Launch CapCut on your PC and begin by importing the videos you wish to overlay. Click on the ‘+’ button to add these videos to your workspace. This is the foundational step to start your overlay creation.
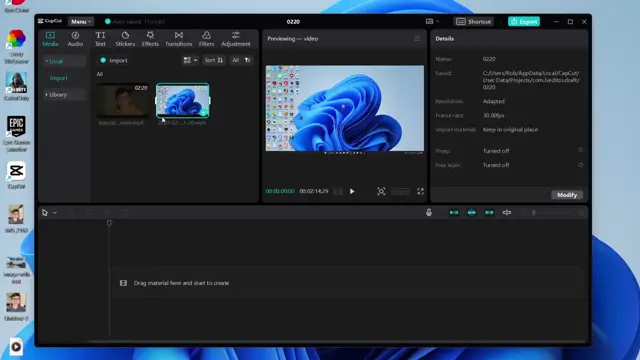
Step 2: Add Background Video
After launching CapCut and importing your videos, tap on the ‘+’ button to select your main background video. This video will serve as the canvas for your overlay.
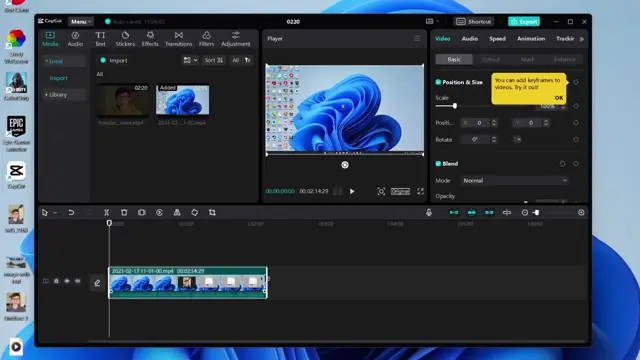
Step 3: Trim Background Video
Once your background video is on the timeline, you may want to trim it. Select the video in the timeline and shorten its length to fit your project requirements.
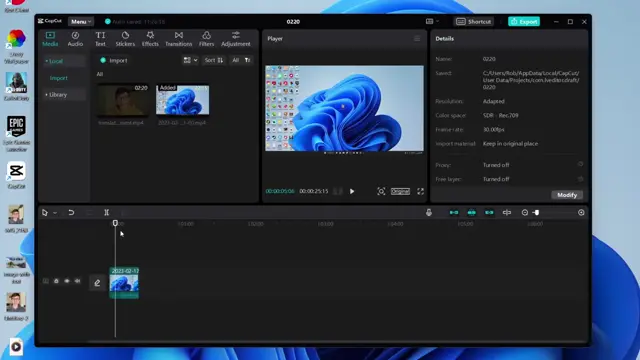
Step 4: Add Overlay Video
Once your background video is in place, go back to your media files. Use the ‘+’ button again to add the video you want to overlay. Ensure both videos are now present on the timeline.
Step 5: Select Overlay Video
Navigate to your media section one more time and tap the ‘+’ button labeled ‘Add to Track’. This selects the video that you want to overlay onto your background.
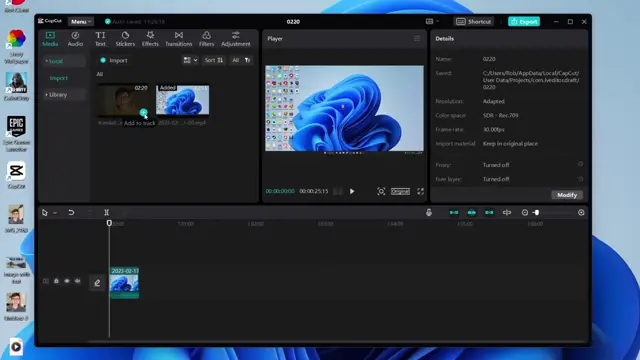
Step 6: Trim Overlay Video
After adding the overlay video, you may need to trim it to keep the parts you want. Select the overlay video and cut it to the desired length.
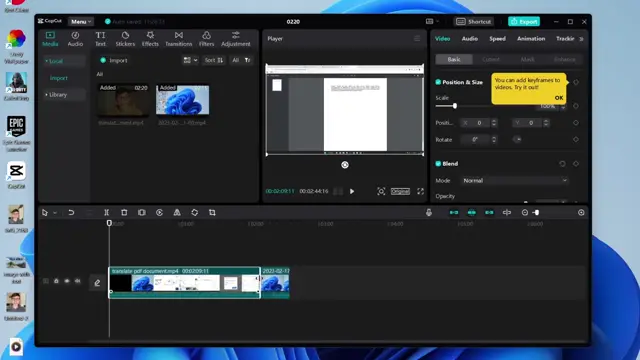
Step 7: Create a New Video Track
Now, click and hold the video you want to overlay and drag it up. This action will move it to a new track, enabling the overlay effect to work by placing it above the background video you previously set.
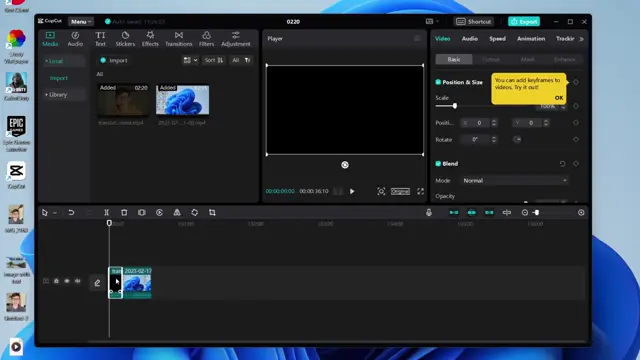
Step 8: Preview Your Overlays
Play the timeline to preview how your overlay looks on top of your main video. Note that while the overlay is visible, the background video should also play under it.
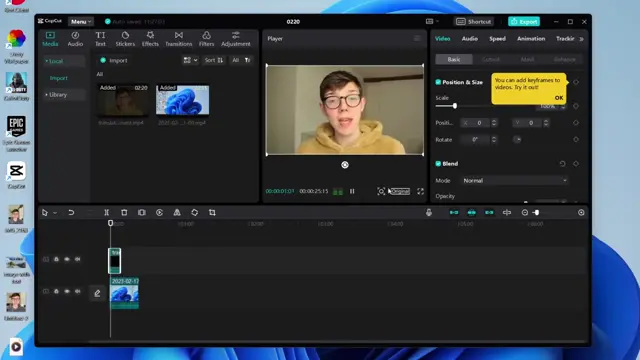
Step 9: Zoom In On Timeline
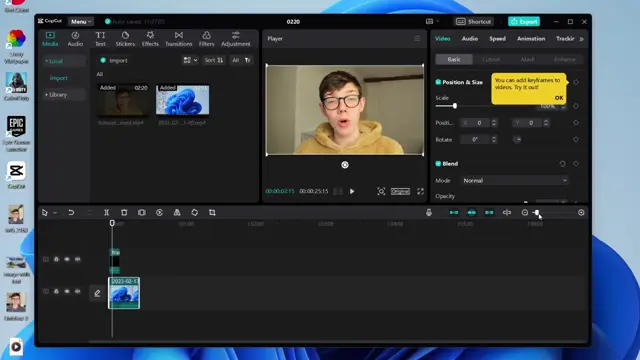
If you need to make finer adjustments or manage multiple clips, zoom in on your timeline for better precision. This will help you easily select and position clips.
Step 10: Adjust Overlay Size
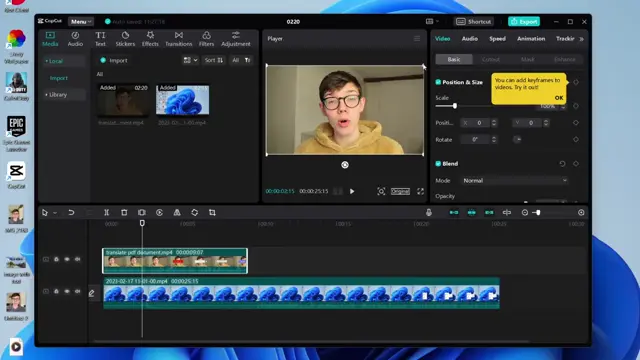
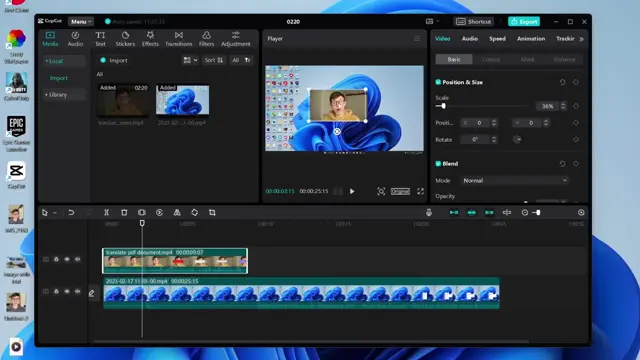
To manipulate the size of your overlay, tap each corner of the video on the preview screen. You can also utilize the scale tool to adjust its dimensions as needed, fitting it perfectly into your video creation.
Step 11: Position Your Overlay
Once you’ve adjusted the size, position your overlay where you want it to appear in the video. You can freely drag it around the preview screen until you’re satisfied with its placement.
Frequently Asked Questions
How do I add text to my CapCut video overlay?
To add text, select the ‘Text’ option in the CapCut menu and then type and customize your text overlay as desired.
Can I change the position of my overlay in CapCut?
Yes, simply click and drag the overlay video to position it anywhere on your canvas in CapCut.
What file formats can I upload to CapCut?
CapCut supports popular video formats like MP4, MOV, and others for seamless importing.
Is there a limit to the number of overlays I can add?
There is no specific limit, but keep in mind that adding too many overlays may impact the performance of the software.
Watch the Video Tutorial
Conclusion
Now that you know how to add and adjust overlays in CapCut on your PC, you can start enhancing your videos creatively. Experiment with different sizes and positions to make your content stand out!





Leave a comment